
스마트시대
2. Construct Website - 2 본문
2.4 FrontEnd
2.4.1 HTML, CSS, JS on Bootstrap
<header> before

<header> after


<main> before1

<main> after1


<main> before2 <main> after2


<detail> before <detail> after


<select_seat>

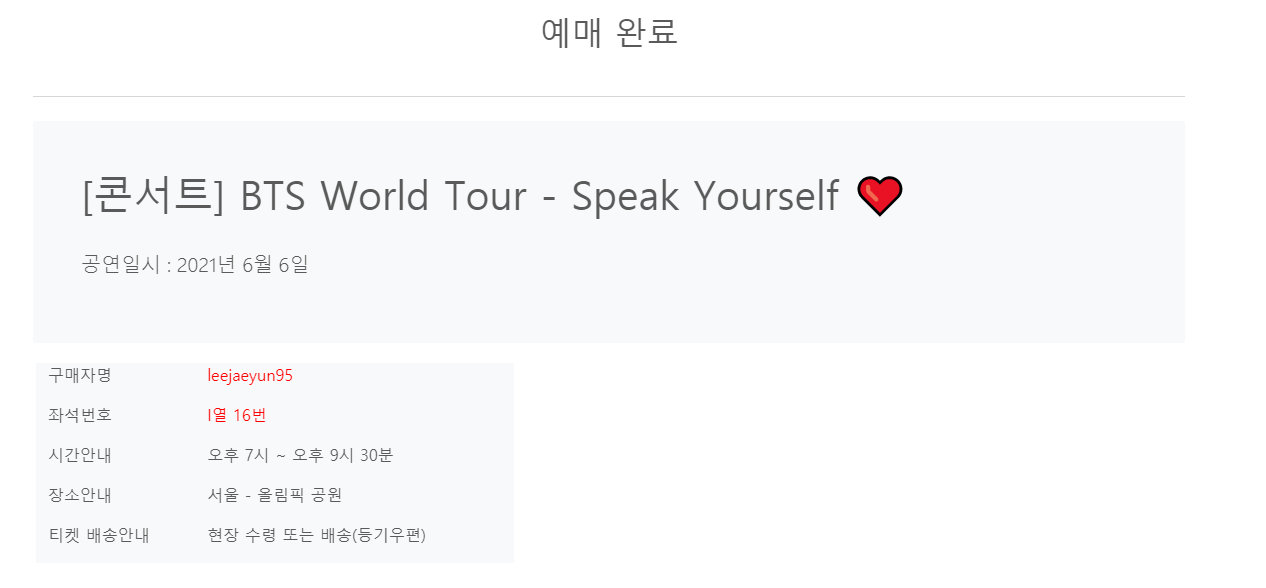
<reserved>
<login> before <login> after


<register> before <register> after


2.4.2 Post on Board(Administrator only)
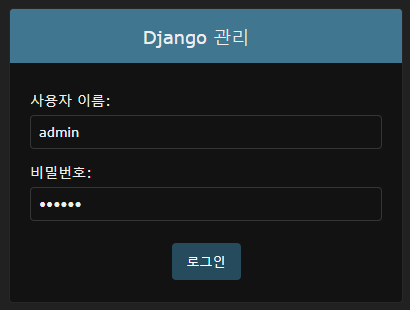
The admin page, accessible through the Django admin login
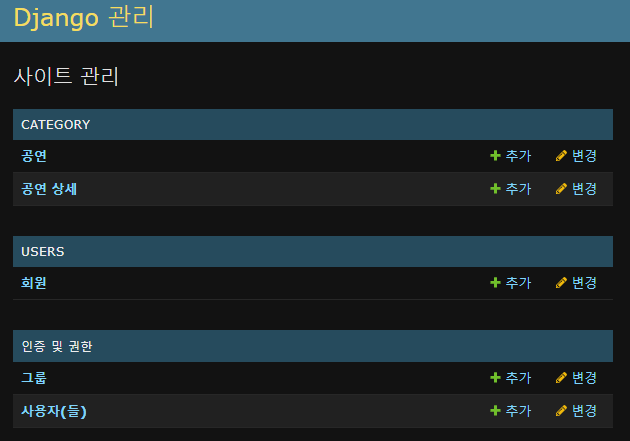
Add performance

2.5 BackEnd
2.5.1 MVT pattern of Django
- Client requests access to ticketing.pw from browser
- Passing URL path and parameters to the view
- Requests the data needed by the view internal function to the model while the operation is performed.
- When the view operation is finished, the result is output to the template and delivered to the client.

2.5.2 Django project structure
If you collect all the static folders in each app under the root directory and use them, you could reduce the path navigation procedure. In other words, it helps to improve performance. You're able to use this method later to keep the static folder in S3.

2.5.3 Django app structure

Let me explain the structure as an MVT pattern below.
- Client searches for ticketing.pw in the browser.
- The URL goes to AWS_Web/myticket/urls.py. (path ' ' is the same as ticketing.pw/)
- Executes a function in category/views.py called 'main.'


- Get the contents of a table named Performance from category/models.py and send it to index.htm.
- Calling category/templates/index.htm
- Repeatedly output all the contents of the DB table through the for statement.

2.5.4 Login (Create Session)

2.5.5 Logout (Delete session)

2.5.6 Sign Up

2.5.7 MySQL DB linkage
Code to create DB table for each app and configuration file to connect to MySQL.

| Install mysql client & pillow |
| [ec2-user@was1 ~]$ source venv_AWS_Web/bin/activate # python virtual environment (venv_AWS_Web) [ec2-user@was1 ~]$ pip install mysqlclient (venv_AWS_Web) [ec2-user@was1 ~]$ python -m pip install pillow |
2.5.8 Django - S3 Bucket, DynamoDB Integration Procedure
Integrate with S3 using boto3, Django storages module and connect with DynamoDB using boto3, Django-Dynamodb session.

2.5.9 Seoul Region - Create S3 Bucket
| Options | Value |
| Bucket versioning | Enabled |
| Block the public access | True |
created bucket

Seoul Region - Purpose of S3 Bucket Creation
To keep the content of a website in one bucket for simultaneous reference by multiple instances.
2.5.10 Virginia Region - Create an S3 Bucket
| 옵션 | 값 |
| 버킷 버전 관리 | 활성화 |
| 퍼블릭 액세스 차단 | True |
created bucket

Virginia Region - Purpose of S3 Bucket Creation
It duplicates the contents of the Seoul bucket and takes over the role in case of a failure in the Seoul Region.
So, I created a bucket replication rule.
2.5.11 Create Bucket Replication Rule (Seoul Bucket -> Virginia Bucket)

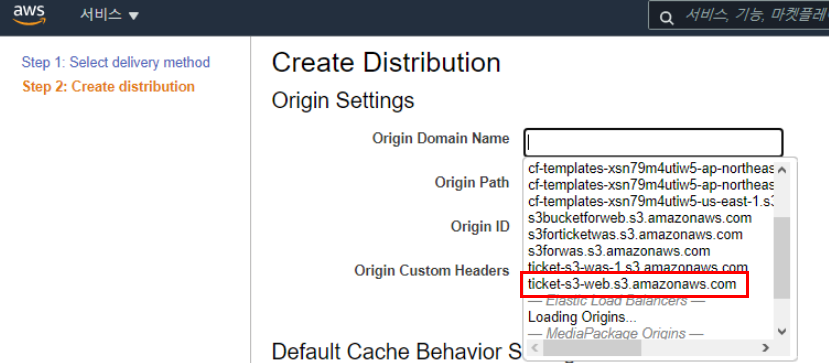
2.5.12 Seoul Region - S3 Bucket - CloudFront Distribution Connection
* Select ticket-s3-web.s3.amazonaws.com, the created S3,
and have to change S3 to ticket-s3-web.ap-northeast-2.amazonaws.com
as Regional DNS Name by typing in manual.
All settings are created with default values and applied.

The purpose for Seoul Region - S3 Bucket - CloudFront Distribution Connection.
In other words, it is for caching static content by CloudFront and delivering the content to the webserver at high speed. This method is faster than the webserver - S3 connection.
They are applied according to customer's performance-oriented requirements.
2.5.13 Virginia Region - S3 Bucket - CloudFront Distribution Connection
All settings are created with default values and applied.

The purpose for Virginia Region - S3 Bucket - CloudFront Distribution Connection.
In other words, it is for caching static content by CloudFront and delivering the content to the webserver at high speed. This method is faster than the webserver - S3 connection.
They are applied according to customer's performance-oriented requirements.
When reading stored content, it goes through CloudFront.
* S3 is the place to store static content, but it is set to request from CloudFront.
Using CloudFront for fast service delivery based on the scenario of simultaneously serving the world.

2.5.14 Django - S3 (CloudFront) integration
The “AWS information” item is used after being separated in the aws_access_tools.py file.

Register the CloudFront URL, which static and dynamic content would load in the Django configuration file.

2.5.15 Create DynamoDB tables
Create a DynamoDB table to store the session.


2.5.16 Django - DynamoDB integration (session maintenance function)
Enter the table name and column name of the created DynamoDB.

Add performance information in detail.

2.6 Deploy
2.6.1 Upload Django code to GitHub
After finishing the local test, upload the Django code to GitHub and git it on the EC2 instance.
| Get GitHub |
| git clone https://github.com/FernandoJaeun/NRG-AWS-Cloud-Project4.git |

2.6.2 Nginx - uWSGI - Django connetion process

- Django is not a web server.
- For regular service, you should add a web server.
- Nginx helps make a good web server for Django.
- Because the language system between Nginx and Django is different, an intermediate interpreter called uWSGI is needed.
- Nginx and uWSGI communicate through the socket method.
- Client and Nginx communicate via HTTP.
2.6.3 uWSGI Configuration
| Install uWSGI |
| yum groupinstall "Development Tools" yum install python-devel pip install uwsgi |
| AWS_Web/uWSGI_Params: The purpose of registering parameters to be used by Nginx and uWSGI as easy-to-read characters |
| uwsgi_param QUERY_STRING $query_string; uwsgi_param REQUEST_METHOD $request_method; uwsgi_param CONTENT_TYPE $content_type; uwsgi_param CONTENT_LENGTH $content_length; uwsgi_param REQUEST_URI $request_uri; uwsgi_param PATH_INFO $document_uri; uwsgi_param DOCUMENT_ROOT $document_root; uwsgi_param SERVER_PROTOCOL $server_protocol; uwsgi_param REQUEST_SCHEME $scheme; uwsgi_param HTTPS $https if_not_empty; uwsgi_param REMOTE_ADDR $remote_addr; uwsgi_param REMOTE_PORT $remote_port; uwsgi_param SERVER_PORT $server_port; uwsgi_param SERVER_NAME $server_name; |
| AWS_Web/myticket_uwsgi.ini: uWSGI configuration file that connects Django and Nginx |
| [uwsgi] username = ec2-user base = /home/%(username) root_dir = AWS_Web project = myticket full_path = %(base)/%(root_dir)/%(project) # full path to Django project's root directory chdir = %(base)/%(root_dir) # Django's wsgi file module = %(project).wsgi # Connect with Django's uWSGI module to pass data to Nginx. # full path to python virtual env home = %(base)/venv_AWS_Web # enable uwsgi master process master = true # maxi/mum number of worker processes processes = 10 # the socket (use the full path to be safe) socket = %(full_path).sock # unix socket file location # socket permissions chmod-socket = 666 # Allow other users access so that Nginx can access the socket file # clear environment on exit vacuum = true # daemonize uwsgi and write messages into given log daemonize = %(base)/uwsgi-emperor.log # uWSGI logging path enable-threads = true single-interpreter = true |
| /etc/systemd/system/uwsgi.service : Daemon configuration for uWSGI auto-run |
| [Unit] Description=uWSGI instance to serve 'myticket' app After=network.target [Service] RemainAfterExit=yes ExecStart=/usr/bin/bash -c 'cd /home/ec2-user/; source venv_AWS_Web/bin/activate; uwsgi --ini AWS_Web/myticket_uwsgi.ini' [Install] WantedBy=multi-user.target |
* 'RemainAfterExit = yes' means that the process remains after the daemon is terminated. If you don't use the ExecStart command and Type together, the default value of Type is 'OneShot.'
It should be in trouble that the daemon service manager runs the unit after the process terminates.
So the RemainAfterExit option is that prevents the unit from disappearing after the process is terminated.

Search for “deactivating” here to see the cause of the error.
| Run uWSGI |
| systemctl restart uwsgi.service systemctl enable uwsgi.service or /usr/bin/bash -c 'cd /home/ec2-user/; source venv_AWS_Web/bin/activate; uwsgi --ini AWS_Web/myticket_uwsgi.ini' |
2.6.4 Nginx Configuration
| /etc/yum.repos.d/nginx.repo : Install Nginx repository |
| [nginx] name=nginx repo baseurl=http://nginx.org/packages/centos/7/$basearch/ gpgcheck=0 enabled=1 |
| Check the nginx repository |
| yum info nginx |
| Install nginx |
| sudo yum install nginx |
| /etc/nginx/nginx.conf : nginx settings |
| user ec2-user ; worker_processes auto; error_log /var/log/nginx/error.log notice; pid /var/run/nginx.pid; events { worker_connections 1024; } http { include /etc/nginx/mime.types; default_type application/octet-stream; client_max_body_size 5M; log_format main '$remote_addr - $remote_user [$time_local] "$request" ' '$status $body_bytes_sent "$http_referer" ' '"$http_user_agent" "$http_x_forwarded_for"'; access_log /var/log/nginx/access.log main; sendfile on; #tcp_nopush on; keepalive_timeout 65; #gzip on; include /etc/nginx/conf.d/myticket.conf; # Separated the configuration file here and saved it. } |
| /etc/nginx/con.d/myticket.conf : Enter the Django information |
| upstream django { server unix:/home/ec2-user/AWS_Web/myticket.sock; # for a file socket } server { listen 80; server_name localhost; charset utf-8; client_max_body_size 128M; location / { # All packets coming to ticketing.pw go to Django. uwsgi_pass django; include /home/ec2-user/AWS_Web/uwsgi_params; } location /static { # All packets from ticketing.pw/static/ go to S3/static. alias https://dcmgpjk4o0sdu.cloudfront.net/static/; } location /media { # All packets from ticketing.pw/media/ go to S3/media. alias https://dcmgpjk4o0sdu.cloudfront.net/media/; } } |
| Run Nginx |
| systemctl restart nginx systemctl enable nginx or /usr/sbin/nginx -c /etc/nginx/nginx.conf |
'Project > Ticketing System' 카테고리의 다른 글
| 2. Construct Website - 1 (0) | 2021.07.07 |
|---|---|
| 1. Overview (0) | 2021.07.07 |

