
스마트시대
AUTHENTICATION 4.1 Login Screen tiktok 4.2 AuthButton 본문
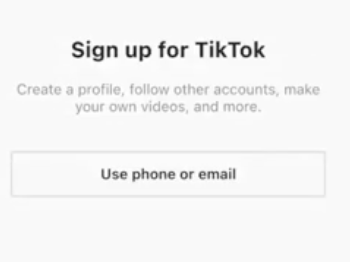
1.Login Screen
SignUp 화면에서 Login Tap 할때 onLoginTap() 구현 로그인 화면과 사인업 화면 상호 Tap시 네이게이션
import 'package:flutter/material.dart';
import 'package:tiktok_clone/constants/gaps.dart';
import 'package:tiktok_clone/constants/sizes.dart';

class LoginScreen extends StatelessWidget {
  const LoginScreen({super.key});

-------
  void onLoginTap(BuildContext context) {
    Navigator.of(context).push(
      MaterialPageRoute(
        builder: (context) => const LoginScreen(),
      ),
    );
  }
 -------

  @override
  Widget build(BuildContext context) {
    return Scaffold(


 ---------------------
                Gaps.h5,
                GestureDetector(
                  onTap: () => onLoginTap(context),
                ),
                Text(
                  'Log in',

 ---------------------
sign_up_screen.dart
~~~~~~~~~~~~~~~~~~

  void onSignUpTap(BuildContext context) {
    Navigator.of(context).push(
      MaterialPageRoute(
        builder: (context) => const SignUpScreen(),
      ),
    );
  }

~~~~~~~~~~~~~~~~~
                Gaps.h5,
                GestureDetector(
                  onTap: () => onSignUpTap(context),
                  child: Text(
                    'Sign up',
~~~~~~~~~~~~`
  }
}
login_screen.dart

위 gif파일을 보면 계속 뒤으로만 가기 때문에 로그인 버튼 누르면 앞으로 가게끔 만들어주자
import 'package:flutter/material.dart';
import 'package:tiktok_clone/constants/gaps.dart';
import 'package:tiktok_clone/constants/sizes.dart';

class LoginScreen extends StatelessWidget {
  const LoginScreen({super.key});

  ~~~~~~~~~~~~~~~~~~~
  void onSignUpTap(BuildContext context) {
    Navigator.of(context).pop();
  }

  ~~~~~~~~~~~~~~~~~~~


auth_button.dart
--------------------


@override
  Widget build(BuildContext context) {
    return FractionallySizedBox(
      widthFactor: 1,
      child: Container(
        padding: const EdgeInsets.symmetric(
          vertical: Sizes.size14,
          horizontal: Sizes.size10,
        ),
        decoration: BoxDecoration(
            border: Border.all(
          color: Colors.grey.shade300,
          width: Sizes.size1,
        )),
        child: Row(
          children: [
            icon,
            Text(
              text,
              style: const TextStyle(
                fontSize: 16,
                fontWeight: FontWeight.w600,
              ),
              textAlign: TextAlign.center,
            ),
          ],
        ),
      ),
    );
  }
}
2 AuthButton
https://github.com/nomadcoders/tiktok_clone/commit/e5580c7cf398f25779b6244b4a1b6827a3fcb5ee
auth_button.dart
        decoration: BoxDecoration(
            border: Border.all(
          color: Colors.grey.shade300,
          width: Sizes.size1,
        )),


        ----------------
        //Row 대신 stack 사용
        child: Stack(
          alignment: Alignment.center,
          children: [
            //icon만 왼쪽으로 이동시키기 위해 align widget 사용
            Align(alignment: Alignment.centerLeft, child: icon),
            Text(
              text,
              style: const TextStyle(
                fontSize: 16,
                fontWeight: FontWeight.w600,
              ),
              textAlign: TextAlign.center,
            ),
          ],
        ),
      ),
    );
  }
}
sign_up_screen.dart
                ),
                textAlign: TextAlign.center,
              ),

              ----------------------------
              Gaps.v40,
              AuthButton(
                icon: FaIcon(FontAwesomeIcons.user),
                text: 'Use email and password',
              ),
              Gaps.v16,
              AuthButton(
                icon: FaIcon(FontAwesomeIcons.apple),
                text: 'Continue with Apple',
              ),
            ],
          ),
        ),
      ),
정리:
font-awesome-flutter 설치 : flutter pub add font_awesome_flutter
pubspec.yaml 에서
yaml cupertino_icons: ^1.0.2 font_awesome_flutter: 10.3.0
AuthButton에 아이콘 넣기
icon: FaIcon(FontAwesomeIcons.solidUser),
텍스트와 아이콘 사이 띄어 놓으면서 가운데 정렬하는 위젯
Creates a widget that expands a child of a [Row], [Column], or [Flex] so that the child fills the available space along the flex widget's main axis.
Stack 위젯 사용
Row : Widget이 가로로 쌓여가면서 배치되는 Container
Stack : Widget이 화면 아래에서부터 위로 쌓여 오버랩이 되는 Container
login_screen.dart도 똑같은 버튼 구현하기
여기서 quick fix로 라이브러리 인포트 할 수 있다.


'Programing > Flutter' 카테고리의 다른 글
| AUTHENTICATION 4.6 Email Screen 4.7 Password Screen 4.8 Birthday Screen 4.9 Login Form (0) | 2023.05.06 |
|---|---|
| AUTHENTICATION4.3 Sign Up Form 4.4 Username Screen 4.5 FormButton (0) | 2023.05.05 |
| AUTHENTICATION 4. sign up screen (0) | 2023.04.24 |
| 이런 데서 코드 작성해서 결과 확인 vscode (0) | 2023.04.09 |
| AppBar, Data Fetching, from Json (0) | 2023.04.05 |


